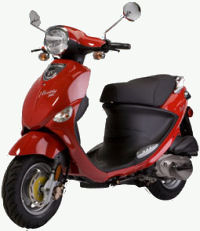
Thursday, December 29, 2011

The Same Old Place - Restaurant Review - Jamaica Plain

On Centre Street in Jamaica Plain, there are a few places where you can get really good pizza. There's the Real Deal with their fancy combinations and the JP House of Pizza on the other side of the street. Same Old Place is unique just because their pizza is tasty without anything fancy on it. The guy making the pizza is visible from the front window so you can watch the whole pizza-making process. However, he might get a little creeped out if you actually stand there staring at him while he works...
Yup, that's the window where you can stare at the pizza guy...

If you look at their menu page profile, you'll see that they're open early at 7 a.m. for breakfast until 11 p.m. and their menu is quite long. In addition to their pizzas, they have various types of burgers, subs, pastas, and sandwiches. They also serve beer. You can tell they have a loyal following from the friendly banter between the customers and the people behind the counter. There was a shooting in late 2010 at Same Old place and the JP community came out in support a few days later by having a peace vigil even though it was cold and windy. I suppose JP is just a very cool neighborhood too.

The last time I went there, I finally ventured into the room that's at the back of the restaurant, to the right. There's a large TV on the wall so you can watch TV while you're eating your meal. The restroom is in the back corner and it's very clean. I liked sitting at the large table with the bench, facing the TV. The place was about half full but it didn't seem loud and I could hear the news clearly. I had the cheese pizza combo, which includes 2 cheese slices and a small 12 oz soft drink. It was a little too much pizza for me. I usually get just one slice and a small drink. The slices are pretty big but the crust is very thin and topped with plenty of cheese.

Anyway, this place is great for poor students who want some great comfort food at almost any time of the day. A slice  and a soda is under $5 and there are all kinds of other things to eat for less than $10. Go try it!
Same Old Place on Urbanspoon

Tuesday, December 27, 2011

Cambridge & Thames Viennese style cream wafer rolls - review

Recently, I found these tasty Cambridge & Thames wafer rolls in Jamaica Plain, MA. The snacks are made in Greece and the ingredient list looks pretty good (no high fructose corn syrup or complicated-sounding things). They're very tasty and only $1.69 a can. There are 17 rolls in each package. They are available in two flavors: Vanilla and Cappuccino. Each can has an inner metal lid with a pull-tab so the snacks stay fresh until you open the can. The plastic lid is reasonably tight but it's nice to have that extra seal on the can.

When you bite into these wafer rolls, the texture is very light and flakey. The cream is sweet and complements the wafer perfectly. Of course the cream is not very moist or else it would make the wafer soggy. Ideally, these would go with a nice cup of coffee or tea because the cream is actually quite sweet after you eat a couple of these. They might go well with ice cream too. If you want to get fancy, these could be cake decorations.

Since this blog is for the frugal-minded, I'd like to mention that the can is not only small enough to stash away in a small compartment of your backpack, it's also durable enough to reuse! These cans are probably recyclable but if you need a strong container for storing things, this can is surprisingly well made. There's one in my scooter's cup-holder for putting little things like a small cloth and a pen. I suppose if you had office supplies (e.g. paper clips, pens, etc.) or small workshop materials (e.g. nails, nuts, bolts, etc.), these cans would be ideal for organizing those too.


Cappuccino and Hazelnut flavors

Friday, December 23, 2011

Bread Machine - an investment that's worth the dough

When bread machines first came out, people thought that they were the best thing since sliced bread. But now, it's quite common to see at least one or two at the local thrift store for only 8 to 15 bucks, depending on which shop you frequent. If you get a new one, they're anywhere between $50 to over $200, depending on brand, whether it's stainless steel or plastic, size of loaf, etc. This is the kind of thing a frugal person would want to try out by getting a used one first and then deciding if it's really going to be used on a regular basis before spending big bucks on a new one.


In my latest youtube video, I showed the whole process of baking bread, using a bread machine to mix the dough and a toaster oven to bake it. I included a short section on what the bread should look like while it's mixing in the bread machine. If it's too moist, add a little flour at a time until it looks right. If it's too dry, add small amounts of water until it starts rotating properly. This video has been featured on http://largetoasteroven.net/
The machine itself is not a complicated contraption. There's a loaf pan with a paddle that is connected to a peg in the pan, which is placed in the machine. The motor in the machine moves the paddle, which agitates and mixes the dough for set times, depending on which mode you choose. When the dough is mixed, you can either take it out to rise and bake in a regular oven or keep it in the machine, which will bake the bread in the shape of your loaf pan. Personally, I like to use the dough function, take it out and bake it in either a toaster oven or regular oven because my machine's loaf pan creates a vertical loaf, which is just a little weird and awkward to cut. The paddle also makes a hole in the bottom of the baked loaf. Furthermore, the pan is very difficult to wash if you bake the bread in the machine. It's much easier to just wash the bits of raw dough.


The basic recipe is:
1 cup water
1 Tbsp oil
1 tsp salt
1-2 Tbsp sugar/honey
3 cups flour
1-2 tsp yeast


It's important to get flour that has a high gluten content because it will help your dough rise properly. When I started using my bread machine, I made quite a few dense bricks because I was using the regular all-purpose flour from the supermarket. Then, I tried the flour from BMS Paper company and I was finally able to make a nice fluffy loaf. The Pillsbury brand flour works well too. If you want to use whole wheat flour or any other type of flour, start experimenting by replacing only 1/4 cup of the white flour with the non-white flour. Eventually, you'll get a feel for how much of the white flour you can substitute before the bread starts coming out too dense or falling while it bakes. If you can find unbleached white flour, that seems to work better than most other flours.


The main advantage of letting the dough rise and then baking it in a regular loaf pan is that you can let it rise as much as you want. The bread machine's mixing and baking cycles are timed so that the dough only has a certain amount of time to rise before the machine automatically starts baking it. However, there is such a thing as letting it rise too much (see picture below). If this happens, just knead it by folding it a few times and then let it rise again. No big deal.
This is what happens when the dough is allowed to rise too long!
As a poor student, using the bread machine to mix saves time and allows you to do your homework while the machine does all the hard work. The only time you need to get your hands dirty is when you dump the dough into the regular loaf pan. Hopefully you have a toaster oven with a timer so that you can just set it and get back to your books. Baking your own bread also allows you to control what goes into your bread. If you read some ingredient labels, you'll notice that some companies still use high fructose corn syrup, which is just a tasteless sweetener. Why use that when you can use honey or molasses? It's also fun to try adding other flours like hemp flour, coconut flour, or whole wheat flour. When it's baking, it also makes your whole house smell good.

Sunday, December 18, 2011

Bagelville - the place to get huge bagels!

I had a groupon for Bagelville and finally had to use it because it was about to expire. It was worth $14 and I ended up getting a dozen bagels with a container of scallion cream cheese. I couldn't believe how large the bagels were! And, the cream cheese was really smooth and tasty. If you don't like bagels, try their cream cheese. It looks like they make it in-house because it's fresh and has an expiry date. I've only tried the scallion flavor but would like to go back to try their other cream cheese flavors. Here are some pictures of the bagels and the scallion cream cheese. Check out how large the bagels are!
Scallion cream cheese from Bagelville

Vegetable bagel on top. Bottom one was multi-grain, I think.

Plain bagel

Whole wheat?

Chocolate chip bagel with a bite out of it...

Sesame bagel

Asiago bagel
 The bagels are $1.41 a piece or $9.95 for a baker's dozen. It's located in Quincy Market right now (Dec. 2011) because Market Place at Faneuil Hall is under construction.
Bagelville on Urbanspoon

Friday, November 25, 2011

Roasting Coffee in the winter

The weather has gotten a bit cooler in Boston recently. The drop in ambient temperatures will affect your coffee roasting results if you don't make any modifications to your set-up. The beans will just not get dark or even to first crack. So, I took a cue from Ryan Jacobs, who simply puts the Poppery into a cardboard box and puts one flap over the Poppery to recirculate the hot air.

If it's cold outside, one of the first things you might notice is that smoke comes out of your popcorn popper. If it smells like your coffee beans roasting, then don't worry about it. However, if it smells like burning plastic, turn the machine off and make sure the machine is not melting. The smoke should be just the steam coming out of the beans as they are roasting. After first crack, you might see a bit more smoke as the beans getting darker. Just monitor the roasting process and trust your nose.

Some air poppers roast hotter than others
I recently saw a Popcorn Pumper at the Goodwill and just had to buy it, even though I already had a Poppery II and a Popcorn Pumper. I'm glad I got it because I discovered that poppers don't all roast at the same temperature. When I used the most recently acquired Pumper, I managed to get to first crack in a shorter period of time and I was able to get a darker roast too. If you get an air popper and it doesn't seem to roast hot enough, try getting another one. If you get the poppers from thrift stores, it won't be a huge investment.

Back to the winter roast
All in all, the cardboard box technique seems to work quite well with all of my air poppers (both the Popcorn Pumper and the Poppery II).

The Popcorn Pumper in the Coffee Bean Direct box works just fine.

At first, you might see some smoke.
To increase the ambient temperature even more, flip over one of the flaps.

Happy winter roasting!

Monday, November 14, 2011

Ghazal Indian Restaurant - Review

Ghazal is a relatively recent addition to the row of restaurants on Centre Street in Jamaica Plain. They might not have the following of Bukhara but that's just because people just don't know about Ghazal yet. All of my room mates who have tried Ghazal love it and either go to Ghazal more or at least just as often as they go to Bukhara. You have the option of dining in or ordering takeout or delivery (on the phone or via Seamless web). (By the way, if you use the Seamless web link here, you can get a $5 discount on your first order, if you're new to the site.) It's one of the few places that don't charge a delivery fee on top of the tip. I like that.

The fact that you can choose to have your food as hot or mild as you like is a great thing. If you think you can take it, the nice chefs at Ghazal will make your meal "Indian hot," which means that it is way hotter than any American food you've ever had. Seriously. Personally, I'm too much of a wimp for that sort of thing. Medium is about as hot as I'll go.

Ok, so what do you order when there are so many choices on the menu? If I'm getting delivery, I like to get the Special Dinner for one. If you're eating with someone, there's also a dinner for two (which is probably enough food for 3 or 4). For less than $25 per person, you will get more than enough food for one meal, unless you're a football player, in which case it will be just enough (see picture below). It includes a samosa, soup, rice, naan bread, crispy things (sorry, I don't know what they were but they were really tasty), a curry dish of your choice, rice pudding (aka "kheer"), and coffee or tea. Oh yeah, you also get 3 sauces: a green one, a brownish one, and a reddish-orange one with onions. The green one is spicy and minty, the brownish one is sweet, and the reddish-orange one is spicy with oniony goodness.

So, how was it? I enjoyed all of it except for the samosa, which was ok but nothing to write home about. Perhaps it would have been better straight out of the fryer. Next time, I'll put it in the toaster oven for a minute before eating it. All of the dishes were nicely seasoned and balanced. The curry dish I chose was the lamb and spinach one (saag?). The fact that they give you rice, crispy things, and naan is great because you can have different dipping instruments for your curry (and soup). That just makes eating Indian food fun! The mulligatawny soup was flavorful and complemented the curry and samosa. For desert, the rice pudding (aka "kheer") has some cardamom in it, which adds a nice flavor to it. After a big meal, the rice pudding was perfect because it was light. The coffee came in a deli container and it was what it was. All in all, it was a really good Indian meal and I would definitely order it again for delivery or take-out.

Ghazal Fine Indian Cuisine on Urbanspoon

Meal for one - enough for at least 2 meals!
Rice pudding "kheer" - flavored with cardamom - Perfect ending to a big meal.

Friday, November 11, 2011

Review: Goya Beef Potato Puffs

These snacks were $3.29 a box at BMS Paper Company. Considering the fact that they're easy to prepare and quite tasty, they were a good purchase. All you have to do is put them on a tray and pop them into the toaster oven for 30 minutes at around 350F. In a regular oven, you need to set it at 375F.
Package
Potato puffs in the toaster oven
The inside of a beef potato puff
Basically, these are just balls of seasoned ground beef wrapped in mashed potato and deep fried. When you put them in the toaster oven, the outside browns and the inside gets nice and hot. They are really good comfort food and one or two would be an ideal afternoon snack with some tea. I suppose a whole box could be a meal.

If you want to get fancy, perhaps you could throw them in a stew and they could be like dumplings or something. 'Nuff said.

Monday, November 7, 2011

Popeye's Chicken - Crawfish Tackle Box review

Popeye's Chicken and Biscuits on Foodio54
Now that I have a scooter, I can get to the Popeye's Chicken that's only a 10-minute scoot from my house. Last week, I went there and tried their "Crawfish Tackle Box," which is shown in the picture below. It includes fried crawfish, fries, a biscuit, and creamy horseradish sauce. For only $4.99, this was a pretty good deal. There's a KFC about a block away but I would much rather go to Popeye's just because their breading is lighter and crispier. The Cajun fries have some nice seasoning making them better than the plain salted KFC fries. The creamy sauce is ok for what it is. Personally, I like to make my own seafood sauce with ketchup and horseradish. Of course the part that I really love about any Popeye's meal is that light and fluffy biscuit. Awesome! I recommend this tackle box deal.
The "Crawfish Tackle Box"

Thursday, October 27, 2011

Riding a scooter (moped) in Boston

The first thing you need to do before getting scooter or moped is to make sure you have either a driver's license or a permit. If you're from another country, you need to convert your license to a Massachusetts license first, before you can apply for a Class M permit, which you need to get if you want to ride a scooter with an engine that is larger than 50 CC. To ride a 50 CC scooter, you just need a Class M permit or driver's license. I waited in line at the DMV for over an hour and was told that I had to get my driving record from Canada before they could convert my license and then let me test for a Class M permit. It didn't matter that my license was expired either. If your license can be converted, then it has to be converted. Whatever. So, I paid $18 to get my certified driving record and had to wait over a month to get it in the mail. When Ontario says that it takes 10 to 15 days to process your order, they start the time when they actually send the thing to the processing place. They sat on my application for almost a month before sending it! Okay, enough about that.

This is a video of a typical ride from Jamaica Plain to Super 88 in Allston:
Ok, so why am I telling you about buying a scooter when this blog is about eating and drinking good stuff for not much money? Well, the point is that one is limited to places around the subway (aka "T-stations" in Boston) if you don't have a personal mode of transportation. A car is just too expensive and bicycles are a little dangerous on some roads. Scooters can give you convenience and help you save money in the long-run. I had a room mate who got into at least 2 bicycle accidents but was fortunately saved by his helmet. He eventually got a motorcycle. For me, I'm just not a big enough badass to get a motorcycle, so I got a scooter. However, I wanted to be just a little badass and opted for the 125 CC scooter instead of the 50 CC scooters, which don't require an M license. The main reason for wanting to get the 125 CC one was because I wanted to be able to keep up with traffic on roads that have speed limits of 30 mph. I know that the 50CC scooters can go up to 30 mph but sometimes the actual speed at which motorists travel on those roads is a little higher. In short, the 125 will give me a few more choices in terms of roads that I can travel on without feeling like I'm holding up traffic. I bought my scooter at Scooters Go Green. Having a scooter gives me a lot more options in terms of where I can go. Public transit only takes you so far and going beyond the central area costs extra. The commuter rail is quite expensive if you go outside Boston. With a scooter that runs 80 to 90 miles per gallon, each trip costs much less than a subway ticket. Some great cheap eats are only bus accessible, which means that you either have to pay extra for delivery or take the bus to get there and back but have cold food. And, if you can get take-out instead of delivery, you'll save on the delivery charge (sometimes $2) and the tip. If you still wanna tip, that's great - I respect that. There are also some places that are only bus accessible or would take 30 or 40 minutes to walk there but only 10 minutes to scoot there. This is when having a scooter is really cool - you get to explore the places that you would never have gone before! For example, I live near a Popeye's Chicken, which would take about 40 minutes to walk there but on my scooter, I can be there in about 10 minutes. There's also a Save-a-lot market near there and I would never have gone without my scooter. If you think about the mileage in terms of how much it costs to scoot one mile, at the peak of $4/gallon at 90 miles/gallon, it's only 4.4 cents a mile! I used to pay $3.40 a day to commute to school but now, it's just a little over a buck a day (it's 12 miles each way). That really adds up. [Update - Jan. 14, 2012 - MBTA proposed fare hikes] Insurance and Safety If you have a clean driving record and take the motorcycle course, your scooter insurance could be as low as $100 a year. So, you're not only saving on gas, but also on insurance. Also, I highly recommend taking the MSF motorcycle course for safety (and not just the savings on insurance). It's quite obvious that riding a scooter or motorcycle is more dangerous than driving a car. However, the MSF course will help you lower your chances of getting into accidents because they will teach you everything about riding a motorcycle safely, from what to wear when riding to learning how to swerve safely. It only takes a weekend and you'll save 10% on your scooter/motorcycle insurance for the rest of your life (and maybe your life too). As an extra precaution, I try not to ride my scooter in the rain or snow. I've ridden in the rain before but it's not fun. Sometimes you'll still have to take public transportation but hopefully the weather cooperates enough so that you can realize some significant savings in addition to the added convenience that the scooter provides. [Update: July 2012]: Recently, there have been a few scooter thefts in the Boston area. If you don't already have one, get a heavy duty chain lock and make sure your scooter is securely locked to an immovable object, such as a light post. One of the scooters that was recovered was in ugly condition when the owner retrieved it.

Tuesday, October 11, 2011

Frugalism - the more effective way to "occupy"

With the recent "Occupy" protests around the U.S. recently, I was thinking about whether there might be a more effective way to address large corporations and get social justice. If we think about the financial system as it is, a lot of what is being sold is hot air and marketing bullsh*t. Think about how much people pay for status symbols and luxury goods. When you look beyond the hype and advertising, you'll see that they are just a bunch of physical objects. The only reason we think of them as being status symbols is because a lot of people have fallen for the marketing bullsh*t.

So, what does this have to do with the protests? Well, I was thinking that the more effective way to protest would be for everyone to adopt a lifestyle of frugalism and make those status symbols meaningless. Once individuals become aware of the fact that those status symbols are perpetuated by their own consent, they can then collectively withdraw their consent and make those status symbols irrelevant and meaningless. For example, if we all agree that Gucci bags are symbols of wealth, fashion, prestige, or whatever, that's what they are. The bag is not inherently so. Once a critical mass of people are aware of the marketing bullsh*t, we could then collectively agree that Gucci bags are merely objects that stupid people buy or change the meaning of the Gucci bag entirely.

It's not enough to just protest and say that things aren't fair because all of us collectively make society what it is. Sure, the protests will get attention and people getting arrested definitely makes a statement. But the only way anything will get done is if there is some kind of disruption that forces change to happen and the disruption does not have to be violent at all. It can be very subtle, through the act of collectively re-thinking what is important and helping each other to see through the marketing bullsh*t. We can do it because many of the people protesting are intelligent young people - at least I hope so because a lot of them are college students! If we all channel more of our money towards stores that recycle (aka thrift stores, Goodwill stores, etc.), not only will those charitable organizations earn more for their causes (usually helping the disadvantaged in some way), we will all be kinder to Mother Earth because we will be buying things that are in decent condition and would otherwise be adding to our overflowing garbage dumps. Corporations will then have to make things that are actually useful to get our dollars. Only then will we be able to "occupy" Wall Street and any other street in this nation.

Thursday, September 22, 2011

Frugal Living (in general)

This blog is about living frugally (but well). In case anyone needs a stronger foundation for this kind of lifestyle, here's a great link: 7 Habits of Highly Frugal People. It's a summary of the book by that title. While I'm not trying to say that college won't lead to a higher salary (so that you can stop living frugally), there are reasons to continue living frugally even if you do end up making a generous salary after graduation. It's all about creating a nice cushion in your bank account so that you never really have to worry about money when you need it. Here are my reasons for living frugally (even if you can afford not to):

1. Save money for a rainy day --- Just think about all the people who have recently lost their jobs because of the economy. Many of them probably had high-paying jobs before they were laid-off. The ones who lived frugally are probably enjoying a nice "sabbatical" while they wait for a job opening. The thing about living frugally is that you will never worry about losing your job or about having enough money if the economy starts sucking because your savings account will always have a nice "cushion".

2. Being frugal is not the same as being "cheap" --- Being "cheap" is when you try to get discounts on things that cost only a buck or deprive yourself because you don't want to let go of your money. Being frugal is just shopping for the right prices and knowing where and how to do that. For a more official definition, the Free Dictionary defines frugal as, "practising economy; living without waste; thrifty". Economists like talking about maximizing utility. Being frugal is maximizing your dollar and not wasting it. If you make frugal living a habit, you won't have to say 'no' to going to a nice restaurant with your friends or getting that pair of shoes that you need for an important interview because your bank account will have a cushion. Also, if you're cooking your own meals and not eating at restaurants on a regular basis, the times you do go will be that much more enjoyable. If you get good enough at cooking, your own meals might even start tasting better than the restaurant meals!

3. It's good for the environment --- For every thing or service you save on, there's probably a benefit to the environment too. I'm not saying that everyone in the world seriously gives a sh*t about the environment, but if you do, living frugally will put less waste out there. Everything you buy has some kind of packaging that ends up either in the garbage or in the recycling bin. Yes, recycling is "good" but it also takes energy to process that recycling. This is why I love going to thrift stores - it maximizes my money but at the same time, I'm consuming something that would have gone to a landfill otherwise.

For more information on what materialism does to people, check out this video:


4. Never feel deprived --- Perhaps this one's a little more zen than some of my readers want to see, but living frugally is very much like vegetarianism. It's a way of thinking that non-frugal people might think is somehow depriving but it really isn't. I'm sure vegetarians don't miss meat after they get used to it. Similarly, I have everything I want, even though most of my possessions are second-hand and I spend less money than most of my friends. It's about re-prioritizing your desires so that your money goes where it needs to go. Restaurant meals might feel like a necessity until you realize that you can make the same thing at home and it's healthier, tastes better, and costs much less.

I'm not going to pretend that this post is going to convert everyone to "frugalism" overnight, but there are compelling reasons for doing so in a crappy economy. The working poor and many college students need to be frugal by necessity but it doesn't mean that others can't be frugal too. If we all think about what we're buying and how it affects our environment, maybe the planet will last longer. Think of frugalism as an all encompassing consumption diet - it will make you and the planet feel better.

Monday, September 5, 2011

Pike fish in the toaster oven

I was at haymarket last week and found some pike fish in the store where I usually buy tuna and salmon. Here's a video of how I prepared it:

The reason I chose the pike fish steak was because it looked very fresh and I had never tried it before. The tuna looked good too but I had that the previous week. In this video, I marinated it quickly with soy sauce, Frank's hot sauce, and some black pepper. It was simple because I wanted to taste the fish and adding more seasoning would just overpower the delicate flavor of the fish, I assumed. It was the first time I had ever cooked pike. Then, I chopped up some mushrooms, basil leaves, and chili peppers to create a "bed" for the fish on the toaster oven tray.

Cooking process:
I put it in the toaster oven for 8 minutes using the bake function at 350F. Then, I flipped it over and broiled it for another 8 minutes at 350F. However, when I took it out, the fish was still a little raw on the inside. So, I put it back in the toaster oven for 5 more minutes on the broil function. After that, the fish was perfectly done. So, the total cooking time was 21 minutes. Perhaps 10 to 11 minutes on each side would be the formula for cooking this fish.

How did it taste?
This fish is a flaky white fish and has a delicate flavor. The soy sauce enhances the flavor a bit. It's very tender when cooked like this and the mushrooms were also done nicely. However, I might not prepare the mushrooms in the same way next time. They would probably be better if they were sauteed in a frying pan with the peppers and basil leaves in some olive oil and soy sauce.

If anyone has any other ideas of what to make in the toaster oven, please leave a comment!

Monday, August 29, 2011

BMS Paper Company - Jamaica Plain - Part 2

Update (Nov. 1, 2011): I just went to BMS and they have 72 oz bags of Toll House chocolate chips for $12.99. This is a pretty amazing deal, in case you're planning on doing some serious holiday baking. Frozen pie shells are 5 for $7.99 and they have frozen cherries and blueberries too. Check it out!

This is the second post on BMS Paper Company, located in Jamaica Plain near Green St. station (orange line). If you were wondering what about the kinds of things that are available there, here are a few pictures of some items I've purchased in the past year there.

1. A gallon of Frank's hot sauce for only $13.99. While a gallon might seem a little excessive, this gallon of sauce actually meets my needs because I go through a 12 oz bottle in only 2 to 3 weeks. I've kept the 12 oz bottle to use as a dispenser and just fill it up whenever it's empty. If you have a funnel, that makes the refilling process much easier. At CVS, a 12 oz bottle is usually $2.37. A gallon is about 10 of those bottles. Since $13.99/$2.37 = 5.9 (approximately), I'm getting 4 free 12 oz bottles of sauce by getting the gallon.
In case you don't know what to do with all that sauce, here are some suggestions:
  • Marinate any kind of meat or fish with it
  • Buffalo wing sauce is basically Frank's hot sauce and butter
  • Use it as a dipping sauce for vegetables or meat
  • Use it to create your own "special sauce" for burgers and other dishes (mine is Frank's hot sauce + soy sauce + cumin --- I guess it's not much of a secret any more...)
Make chili in a frying pan (see my post on that)
    2. A gallon of Kosher dill pickle chips for $5.99
    Again, this might seem a little excessive. However, if you look at the price of a smaller jar of pickles, this might not seem like a bad idea. With all the liquid in this gallon jar, you could probably reuse it to make some fresh pickles with some dill and spices. I like to store a small portion in the fridge in a glass jar because I like cold pickles on my sandwiches.

    There are other uses for pickles (besides putting them in sandwiches):


    3. Silicon mat (larger than the ones you get at department stores) for $7.99

    Silpat Non-Stick Silicone Baking Liner, 11.75-Inch by 8.25-Inch
    Smaller Silpat silicon mat
    (11.75 by 8.25 inches)
    They actually have two sizes and they are both larger than my baking trays/pans. I have the smaller one and the width of it is the length of my lasagna pan. If you need a smaller size, Macy's has the Silpat mats but you'll be paying about $13 to $20 for those because they're Martha Stewart's brand. Amazon.com also has them for a bit less but you need to add shipping costs. BMS carries the Winware brand in large sizes. I've used it for sponge toffee and French macaron. It works very well for both.
    Large silicon mat from BMS Paper Company (less than $10!)

    In addition to these items, I have also bought several frozen items that have been great deals and pretty good quality too. The Italian meatballs are very tasty and save a lot of time because all you have to do is pop them in your toaster oven or throw them into a tomato sauce (to serve with pasta) for a quick snack or meal. At $8.99 for 3 lbs, that's enough for several spaghetti and meatball meals. The frozen veggies are good to keep around in case you can't make it to haymarket one week. They have a good selection of corn, mixed veggies, and other varieties for less than $4 a bag.

    The only flour that seems to work for me when making bread is from here too. The Hecker's brand is an unbleached flour and makes my bread rise better than other brands do. Five-pound bags are $3.89, which doesn't seem like a great value but it's the only flour that works with my bread machine. Other flours seem to create bread bricks. They also have 2 lb bags of yeast, in case you want to make a lot of bread. The yeast freezes quite well too. I've had the same package for several years and it still works. Store it in a airtight container in the freezer and then take a little out at a time to store in the fridge.

    Sunday, August 21, 2011

    Roasting your own coffee - part 4 - Pumper vs Poppery II

    Update (Nov. 20, 2011): I found and bought a second Popcorn Pumper at the Goodwill last month and discovered that not all machines (even within the same model) are created equal. My newest Pumper actually gets hot enough so that first crack takes only 6 minutes, like others have demonstrated on Youtube. My other two air poppers take about 10 minutes. So, if you have an air popper that seems to take forever to reach first crack, try another one, even if it's the same brand!
    -------------
    This is the fourth post about roasting your own coffee with a popcorn popper. This might seem a little excessive but if you think about the amount of coffee that you'll drink when you're a college student, it seems worthwhile to learn how to make the best cup of coffee that you possibly can without breaking the bank or wasting too much time. If you're going to drink a lot of it, make it good and enjoy it!

    The inspiration for this post was the purchase of a second air popper at my local Goodwill store. I saw it on the shelf, plugged it in to test it (it worked), and bought it for $6.99 + tax. It was the Poppery II, which is the preferred model on Sweet Maria's. I had been going to the Goodwill twice a week looking for an air popper because I wanted a backup machine in case my Popcorn Pumper ever stops working.

    Since I now have these two different brands of air poppers, I thought it might be useful and interesting to do a comparison of the two machines. The chambers look similar in that they have the same air vents on the side. However, the Pumper has a little bump on the bottom of the chamber. In the picture below, you can see that the Poppery has a higher point where the sliver part meets the black top part. However, it has a groove in the silver part of the chamber that shows you where the approximate maximum fill point is. In the Pumper, the maximum fill point is approximately where the sliver part meets the black part. In either machine, you really need to watch how fast the beans rotate at the start of the roast. If they're moving too quickly, add more beans. Otherwise, you'll never get to first crack and will have to finish them off in the toaster oven.
    Poppery II (left) and Popcorn Pumper (right) 
    Closer look: Pumper has a bump on the bottom of the chamber
    The Covers
    The other main difference between the two machines is that the Poppery II has a clear lid, which enables you to watch the coffee roasting process from beginning to end without having to remove it. Some Poppery II models have a yellowish lid but they won't be as dark as the one on the Pumper. The Pumper also has that removable butter melting cup on top but every time you open it, the temperature inside the chamber drops. This could be important in cooler temperatures, when you don't want the ambient temperature to affect the temperature inside the chamber. Also, there are vents on the Poppery cover but I'm not sure what their function is. Writer of other blogs have warned that the cover will melt after a few roasts but I'm hoping this doesn't happen with mine. If it looks like it's going to warp soon, I'll save it for winter roasting.

    Other Differences:
    • Wattage of the Poppery II is 1200 W, the Pumper is 1250 W
    • Poppery II is a little shorter than the Pumper
    • Poppery II is a little quieter than the Pumper (this means that you might be able to hear the cracks better with the Poppery II)
    • The bottom of the Pumper chamber has a little bump in the center while the bottom of the Poppery II chamber is just flat. Perhaps this explains why the beans move a little more efficiently in the Pumper.

    Poppery II (left), Pumper (right)

    The reason I wanted to compare the machines was because other people on youtube have managed to create dark roasts in half the time it took me with my Popcorn Pumper. Even though the wattage of the Poppery II is slightly lower, I thought the design of the Poppery II might make it faster to roast a batch of coffee. The first few batches in the Poppery II didn't seem to work because the beans took forever to get to first crack, if at all. I had to finish them off in the toaster oven. While this worked fine because most of the chaff came off when the beans were spinning around, I still wanted to be able to do a complete roast in the Poppery II. I also remember having a similar problem with the Popcorn Pumper when I first got it. Perhaps the machines need to be "conditioned" before they are able to do a complete roast.

    After roasting a about 3 or 4 batches, I was finally able to do a complete roast and hear the first crack. It also helps to add more coffee beans than you think is enough. The beans should look like they are percolating and not moving much at the start. Here's a video of me comparing the two machines and a more recent roast in the Poppery II:


    I roasted the beans for over 13 minutes and wasn't able to see any oils at that point. Sometimes the oils take a few days to come out of the beans. I've been able to see a bit of oil when I use the Popcorn Pumper. Perhaps it just takes a few more batches for the Poppery II to be broken in fully. The slightly lower wattage of the Poppery II might also prevent me from getting the beans up to a high enough temperature. Time will tell.

    Resting the coffee
    Some people on the web will say that the coffee tastes the best 4 to 24 hours after the roast. However, I've found that the coffee actually has more flavor a few days after the roast. It really depends on the bean. There's a de-gassing process that needs to happen. So, if your coffee tastes a little flat at first, let the beans rest a day or so and try again. At some point, you'll get a feel for how long it takes for the beans to reach their full flavor.

    Saturday, August 6, 2011

    The humble toaster oven - broiling tuna steaks

    If you go to a restaurant, having fresh tuna is often expensive and looks like it takes some skill to prepare. At home, if you have a toaster oven, it's possible to make a delicious tuna steak without much effort. The tuna steaks at the supermarket are quite expensive so if possible, check out the store below the cheese/deli store at Haymarket on Friday or Saturday to see if they have any tuna available. They usually sell it for about $4/lb, which is significantly less than the supermarket price.

    Here is a video of the whole process:

    Frank's RedHot Hot Sauce , 23 oz (680 ml)

    Even though my "secret sauce" is Frank's hot sauce, soy sauce, cumin, and black pepper, you can always use whatever type of sauce you like to marinate the tuna. The advantage of using the toaster oven instead of a frying pan is that you can set the timer and go away while it's cooking. You can also control the type of "crust" you want by varying the temperature of the toaster oven. I set it at 350 F and that resulted in a very soft crust. If you would like a firmer outside part, you need to turn the temperature up and reduce the cooking time.

    I also put basil leaves under the steak to add some extra flavor. The leaves needed to be under the tuna because they would have burned on top of the steak. Another way to use herbs is to add them after you finish cooking.

    Monday, July 25, 2011

    Roasting your own coffee - part 3

    After I got a Poppery II from the Goodwill store, I tried roasting a batch of Sumatra beans. Initially, I thought it would be very similar to the Popcorn Pumper because the two machines looked similar on the inside. However, it was a little more difficult to determine the right amount of beans to use at first because the lower wattage of the Poppery II meant that the beans would spin slower in there (than in the Pumper). So, I ended up having to finish off the first couple of batches of beans in the toaster oven. Unlike the previous experience of using the toaster oven, this time I used my GE convection toaster oven. The results were much better because the heat was evenly distributed this time. You can see in the picture below that the beans were a uniform color. If you compare this to the results from the previous post on coffee roasting results, it's obvious that the convection oven helped to create a more even roast.

    Sumatra light roast, finished off in the GE convection toaster oven
    Previous uneven roast finished off in the Black & Decker toaster oven
    The Light Roast is actually more flavorful!
    I prepared the coffee using my espresso machine and the crema was very thick. That was already a good sign. The surprise was that this light roast actually has more flavor than the darker roasts that I had been drinking since I figured out how to create dark roasts in the Popcorn Pumper. I was able to taste more of the bean and taste the "hint of fruit" that was mentioned on Sweet Maria's site. There was also a little more earthiness in the lighter roast. With darker roasts, the smokiness often overpowers the subtle flavors of the coffee bean. While I like the smokiness sometimes, I figure I might as well taste the coffee bean too if I'm going to pay a little more for the "better" beans. Otherwise, I might as well buy the cheap beans to do dark roasts because most dark coffees taste very similar. If you plan on drinking only dark roasts and want cheap beans, go for the "Poor Man's Blend" on Coffee Bean Direct (5 lbs of green coffee beans for only $23).

    To combine the smokiness with the flavor of the bean, try blending the light and dark beans. This might give you the best of both worlds.

    In the end, this was a very happy accident. It was a good thing that I wasn't able to create a dark roast with the Poppery II because I can now enjoy Sumatra coffee more and taste all the flavors that are hidden in that bean.

    In the next coffee roasting post, I will do a comparison of the Popcorn Pumper and the Poppery II.

    Tuesday, July 19, 2011

    Pizza - the cheapest meal in town

    Most college students will have quite a few slices of pizza during their 4 years in the dorms or wherever they live. In one recent episode of the TV show, Nightline, pizza was shown to be in higher demand during recessions because it's such a cheap meal. So, it's no surprise that pizza is such a popular meal for poor college students. Unlike the rest of the population, there are fewer fluctuations in demand. This is why I thought that a post on pizza would be appropriate for this blog.

    In my previous post on making pizza in the humble toaster oven, I didn't really get into the ingredients themselves. The point was to show you that the toaster oven can do things you might not expect were possible. This post is about the ingredients. At this point, you might be wondering why you should even consider making your own pizza? Getting a pizza delivered usually costs around $10. Depending on what you put on your pizza, you can make it at home for much less and with not much time or energy. The trick is to make a lot of dough at one time and then store it in the freezer. Defrost a portion in the fridge over night when you think you'll have pizza.

    Get some Pizza Dough
    Making the dough is what takes the most time. If you really don't want to make your own dough, you can usually buy the dough for very little money. Most supermarkets and Trader Joe's sell balls of dough for about $1 to $2 each. If you're willing to spend $2.50 (plus tax) for a ball of really tasty dough, try the balls of dough from Oggi Gourmet at Harvard Square. They're located in the Holyoke Center (by Au Bon Pain) and don't really advertise that they sell dough, but they do. Just ask for "a ball of dough". I try to get some every time I'm in the area. It's actually better than the stuff you get from supermarkets and worth the extra couple of bucks. It's still cheaper than ordering pizza! Most balls of dough from any place are enough for two medium to large thin crust pizzas.

    For those of you who are willing to get your hands dirty and try making your own dough, a bread machine will save you a lot of time and effort. All you have to do with one of those is put the ingredients in the pan, choose the mixing function (so it mixes the dough but doesn't bake it), and start it. In about 1.5 hours, you have a ball of pizza dough! Go to any thrift store and there will probably be a bread machine selling for about $10 or less. As an added benefit, you can bake your own funny-looking bread in it too. Actually, it's better to mix the dough in the machine, take it out, put it in a baking pan, let it rise for an hour or more, and then bake it in the oven. That's just my opinion though - do whatever you have time to do.

    The basic ingredients for dough are flour, sugar, yeast, salt, and water. Flour will be about $2 to $4 a bag and sugar is quite inexpensive at CVS. If you plan to make your own pizza and bread for an extended period of time, you can get 2 lb bags of yeast for less than $10 at BMS Paper Company or at haymarket in the middle-eastern store. Even though you don't need a lot of yeast for each batch, the stuff you get at the supermarket is not cheap. Try to find some friends who might want some yeast and divide that 2 lb bag. It freezes quite well. I've had the same bag in the freezer for over 2 years and it still works. Just take out a few ounces at a time and put it in a clean jar to store in the fridge.

    Roll out the dough
    If you sprinkle some flour on your pizza pan before rolling out the dough on it, you'll have an easier time cleaning up afterwards. Now, when I say, "rolling out," I don't really mean that you need a rolling pin to flatten it. All you really need to do is to press down on the dough on the pizza pan a little bit at a time and eventually, it will stretch out enough. If it doesn't seem to stretch out enough, let it sit for a while and then try stretching it again. When the dough gets to the edge of the pan, throw the toppings on and put it in the oven.

    Throw the toppings on!
    The toppings are relatively easy to prepare. Grate the cheese and chop up everything else. At haymarket, you can get a chunk of cheese (around 6 to 8 oz, depending on the type of cheese) for $3, 2 chunks for $5, or 3 for $7. If they have cheddar, muenster or mozzarella, that's going to be about 8 oz. You shouldn't need more than half a chunk for a small pizza. For sauce, buy the pasta sauce that goes on sale every now and then (usually 3 jars for $5). Go easy on the sauce though because too much sauce will make dough soggy. The thinner the dough, the lighter the toppings need to be. Otherwise, you won't be able to pick up the pizza and have it stay in one piece.

    If all of these instructions are a little overwhelming, here's a video by Sousoukitchen to show you (in English and in French) how to make the dough using a food processor to mix the ingredients to get the dough together and the rest of the process step by step.


    Average cost of a homemade pizza:
    Let's say you make 6 pizzas with one bag of flour ($4 a bag), which comes to 67 cents a pizza. Two lbs of sugar at CVS is only $3 when it's on sale. There are 9 cups in one of those yellow Domino round containers. Let's say you use 2 Tbsp per pizza, which means it will be less than 10 cents a pizza. The yeast should also be less than 10 cents a pizza. For salt, if you seriously don't have any, go to your school cafeteria and take a couple of salt packets. Water is free. So, the dough should cost about  87 cents to make. The cheese is the most expensive part. If you use half a chunk of cheese, that's about $1.50 or less, assuming that you bought only one chunk of cheese at haymarket. The amount of sauce you use will be very little, so let's say that's about 17 cents (10% of the Ragu jar from CVS, on sale for 3 jars/$5). Tally it up and each cheese pizza costs only $2.54. Any toppings you add will be extra but probably won't add up to anywhere near $10. Now you know why Domino's makes so much money.

    Save even more by using the toaster oven (to save electricity)
    If you have a large toaster oven, you can bake a pretty big pizza and use less electricity that you would with your regular oven. If you have a smaller toaster oven, it's possible to make small pizzas that feed one person. Two personal pizzas can probably fit in a small toaster oven. It should take about 20-25 minutes at 400 F to fully bake the pizzas. Larger pizzas will take a few more minutes. However, each oven is different, depending on size and accuracy of temperature. Watch the cooking process closely at first to make sure you don't burn it.

    Monday, July 11, 2011

    Making cheap non-dairy homemade ice cream - Part 2

    I suppose the non-dairy stuff that's made from just bananas cannot really be called "ice cream" because there's no cream in it. If it makes you feel better, call it banana fluff because that's what it tastes like. I should also mention that another blog that features this banana ice cream idea is "Kitchn". That blog has excellent ideas that go beyond what I do here. Check out their 4-ingredient peach frozen yogurt. For those of you who really want dairy milk but are lactose intolerant, there's a post about making your own Lactaid milk with lactase drops. It's by someone named "Tammy". I haven't tried it but it makes sense because lactase is the enzyme that helps you digest lactose.

    In this post, I'd like to show you another way to make the banana ice cream, using unfrozen bananas. First, to recap the previous post, here are the results of the chocolate banana ice cream for jocks, which was made using frozen banana chunks. It was definitely more fun to eat than a smoothie. I had to add 1/4 cup of liquid to the mixture to bring the bananas and protein powder together to form a creamy concoction.
    Freshly made chocolate banana fluff made with frozen banana chunks
    When I tried to process just the frozen bananas and the protein powder, I just got a very mealy mixture that did not look very good. After adding 1/4 cup soy milk and processing the mixture again, I got the result you see in the picture above. It was smooth and creamy. It wasn't very sweet and that might turn some people off. If you have a sweet tooth, add 1/4 cup sugar. However, I thought it was sweet enough with the sweeteners from the bananas and the protein powder.

    I then portioned out the mixture and stored the ice cream in some cleaned out yogurt containers. They are the perfect size (8 oz). After freezing for a few hours, it looked more like hard ice cream. The thing is, if you freeze it too long, it might get too hard and icy. At that point, you'll have to thaw it for about 10 to 20 minutes before eating it. No big deal.

    A few days later, I tried the recipe again without the soy milk but added a tablespoon of honey. Since honey is a liquid, the bananas got creamy without having to add any soy milk. The result was also a little thicker than the batch made with the soy milk. So, if you don't want to add any soy milk to your frozen bananas and want it to be a little sweeter and thicker, try blending banana chunks, 1/4 cup chocolate protein powder, and a tablespoon of honey.

    It looks more like hard ice cream after freezing a few hours
    Another way to do the same thing is to use a blender to puree all the ingredients together and then use an ice cream maker to finish the process. The advantage is that you won't have to freeze the bananas. However, you'll need to chill the mixture for at least a couple of hours before pouring it into the ice cream maker and that you'll need an ice cream maker. Check your favorite thrift store and see if there's a cheap one. If not, the cheapest machines at department stores go for about $30 or less. You don't need anything fancy.

    When you put a banana in your ice cream mixture, it actually functions as a thickener. Some recipes suggest using an egg or two and heating it up until it's thick. Well, we're students and don't have time for that fancy crap! Use a banana and you won't need to heat anything up. Also, you can use less sugar because the banana supplies a bit of that too. Genius, right?

    Okay, so here's a suggested recipe for making ice cream using bananas as a thickener. You'll need:
    • a 13.5 oz can of coconut milk
    • 1 ripe banana
    • 1/4 cup honey or sugar (use more if you like it sweeter)
    • flavoring ingredients (e.g. cocoa powder, protein powder, vanilla, etc.)
    Blend it all up and then chill it in the fridge for at least a couple of hours. Then, turn on your ice cream machine and pour in the chilled mixture. In about 20 to 40 minutes (depending on your machine), you'll have a nice non-dairy soft-serve ice cream. Freeze it in an air-tight container for a few hours if you prefer a harder ice cream.

    Tuesday, July 5, 2011

    Chinese snacks - Part three (Choco Rolls)

    Choco Roll is a relatively new snack from Taiwan. Online, they're $2.41 a box (as of July, 2011). I saw it on the shelf during my recent trip to C-Mart. It was $1.99 for a box (7 individually wrapped rolls) and looked promising. This comes in taro flavor too. For review of that, click here. For the pudding flavor, here's a picture and a review of my first impressions:

    My fingers are covering "Product of Taiwan"
    The chocolate by itself was not wonderful. However, in combination with the "pudding" and the cookie center, it was ok. Even after leaving it out at room temperature for a day, the center did not get soft like pudding. I guess it tasted a little like vanilla pudding. The best part of this snack is the texture. I liked the crunch of the cookie. However, the chocolate could have been better made. It had an almost waxy texture that wasn't particularly pleasant. Maybe the kids would like it.

    The picture on the box really raises one's expectations a little too high for those of us who have had pudding and good chocolate. It's sweet but not in the North American way. I think people who enjoy the lower amounts of sugar in Asian sweets might enjoy this enough to buy it. Overall, I'd give this snack a 3/5. If you want an Asian snack with a good chocolate coating, go for the Japanese snacks.

    Wednesday, June 29, 2011

    The humble toaster oven (continued) - making pizza

    In the last post on the humble toaster oven, I made bread. In this post, I'm going to show you how easy it is to make pizza in whatever size toaster oven you have. If you have a small toaster oven, you can make a small round pizza or medium rectangular pizza. It doesn't matter if you don't have a pizza pan because you can just make one out of some aluminum foil.

    The toaster oven I used to make pizza was the GE convection toaster oven that I got from the Goodwill. The pan that I used barely fit in there so I would probably use a slightly smaller pan or a rectangular pan the next time. To make this pizza a little healthier, I used a bean and tomato sauce puree instead of a regular tomato sauce. The advantages of doing this was that I could use up my leftover red beans, get some extra protein in my pizza without adding meat, and the bean puree was less watery than tomato sauce. If you've ever made homemade pizza and ended up with a soggy crust, it was probably because you put too much tomato sauce on it. The bean tomato puree had just enough moisture in it to moisten my dried mushrooms, which were the main topping on the pizza.

    Toppings:
    bean tomato puree (use blender to puree cooked beans and tomato sauce)
    minced garlic
    dried mushrooms
    grated swiss cheese
    tomato sauce (for the smiley face)
    olive oil (so the dough didn't stick to the pan)
    Pizza about to get baked
    This is what it looks like when it's done.
    The dough was from Oggi Gourmet in Harvard Square. Their dough is much better than mine. The bean puree was actually very good on the pizza! Initially, I put it on there just because I was trying to put more beans in my diet and wanted to create a less watery sauce but it also adds another layer of texture to the pizza. I'd put it on pizza again just because it tastes (and feels) good. The dried mushrooms were more flavorful than fresh mushrooms and had a nice earthy flavor. However, I dried those mushrooms in a dehydrator, which means that they might not be as dry as the shitake mushrooms at the Chinese supermarkets. If you want to try adding dried mushrooms, it might be a good idea to soak them for at least 15 minutes before putting them on the pizza.
    Here's a video showing the baking process: